The Ultimate Guide: How to Store Coffee Beans for Maximum Freshness

Learn how to store coffee beans to keep them fresh longer! Expert tips on best containers, ideal locations, and insider secrets for preserving rich flavors.
Did you know that properly stored coffee beans can retain their flavor for up to 4 weeks, while poorly stored beans might become stale in just a few days? As coffee lovers, we’ve all experienced that disappointing cup from beans that have lost their magic.
Whether you’re a casual coffee drinker or a dedicated enthusiast, understanding the science behind coffee freshness and implementing the right storage techniques will revolutionize your daily brew. Fresh beans make all the difference—let’s dive into keeping those precious beans at their peak flavor!
Understanding Coffee Bean Freshness
I wish someone had told me about coffee bean freshness when I first got serious about coffee. I was buying those shiny bags from the grocery store and wondering why my coffee tasted so… bland. Well, I was basically drinking stale bean juice for months.
Why Coffee Beans Release Gas After Roasting
Here’s the thing about freshly roasted coffee beans – they’re actually alive in a way. Right after roasting, coffee beans start releasing CO2 through a process called degassing. This happens for about 2-14 days after the roast date, and it’s why you’ll sometimes see those little valve thingies on coffee bags. Without that valve, the bag would literally puff up like a balloon from all the gas.
Curious about how roast levels affect degassing and flavor stability? Check out our guide on Understanding Coffee Bean Roast Levels: From Light to Dark.
I made the mistake of grinding beans immediately after getting them home from the roaster once. The coffee was so acidic and harsh – totally undrinkable. Now I know you gotta let them rest for at least 3-5 days after roasting before brewing.
The Four Main Enemies That Destroy Coffee Freshness
The four horsemen of coffee apocalypse are air, moisture, heat, and light. These enemies work together to destroy your beans faster than you’d think. Oxygen exposure causes oxidation, which makes coffee taste flat and cardboard-like. Moisture creates condensation that can actually make beans go moldy. Heat speeds up the staling process dramatically, and light breaks down the oils that give coffee its flavor.
I used to store my beans in clear containers on the counter because they looked pretty – rookie mistake. Now I keep them in airtight, opaque containers in the coolest part of my kitchen, away from the stove and that sunny window.
Learn What a Roast Date Actually Tells You
The Perfect Timeline for Coffee Bean Freshness
Here’s the timeline that changed everything for me: coffee beans hit their peak flavor between 7-21 days after roasting. Before day 7, they’re still degassing and can taste sour or underdeveloped. After 3-4 weeks, they start going downhill fast. By 6-8 weeks, you’re looking at pretty stale coffee that’s lost most of its complexity.

Common Myths About Coffee Bean Storage
The biggest myth I believed was that coffee beans stay fresh for months if unopened. Total nonsense. Even in sealed bags, coffee starts losing its flavor within weeks of roasting. Another misconception? Storing beans in the freezer. Don’t do it unless you’re planning to freeze them in small portions and never refreeze – the temperature fluctuations create moisture that destroys the beans.
How to Tell Fresh Coffee Beans from Stale Ones
Fresh coffee beans have this amazing aroma when you open the container – it should smell rich and complex.
Stale beans smell flat or sometimes even rancid. Fresh beans also make a satisfying crack when you bite into them, while stale ones just crumble without much resistance. When you grind fresh beans, they’ll bloom and release visible CO2 when you pour hot water over them during brewing.
Ever noticed your coffee tastes amazing one day and flat the next? It’s not just storage—there are multiple factors at play. Here’s why your coffee tastes better some days.
Best Containers for Storing Coffee Beans
I’ve probably wasted more money on bad coffee storage containers than I care to admit. My kitchen cabinet used to look like a graveyard of failed attempts – clear mason jars, fancy ceramic canisters, and those flimsy plastic things that barely lasted a month. But through all those mistakes, I figured out what actually works.
Glass vs. Ceramic vs. Metal vs. Plastic: The Real Deal
Let’s talk materials, because this is where most people get it wrong. Glass containers look gorgeous on your counter, but they’re coffee’s worst enemy if they’re clear. Light destroys coffee oils faster than you’d think, so unless you’re storing them in a dark cabinet, skip the clear glass. Dark amber or opaque glass? That’s a different story – they work great.
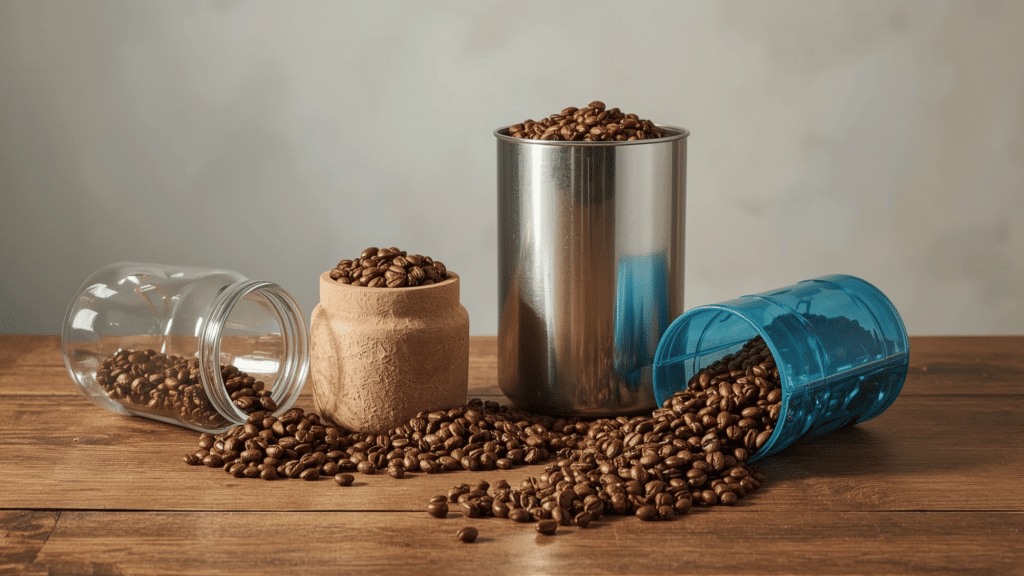
Ceramic containers are solid middle-ground options. They block light completely and don’t absorb odors like some plastics do. The downside is they’re heavy and can break if you’re clumsy like me. I’ve lost two good ceramic canisters to kitchen accidents.
If you’re tracking acidity and roast-based storage needs, our article on Low Acid Coffee: Options for Sensitive Stomachs explains how roast level can influence how your beans behave over time.
Metal containers, especially stainless steel ones, are my personal favorites now. They’re lightweight, don’t break, block light completely, and don’t mess with the coffee’s flavor. Avoid aluminum though – it can give your coffee a metallic taste over time.
Plastic gets a bad rap, but food-grade BPA-free plastic containers can work if they’re opaque and have good seals. The problem is most plastic containers aren’t truly airtight, and cheaper ones can absorb coffee oils and develop that stale smell that never goes away.
Why Those Fancy Valve Containers Are Worth It
I was skeptical about those specialized coffee containers with one-way valves until I tried one. They let CO2 escape without letting oxygen in. Remember how fresh beans keep degassing for days after roasting? Regular containers trap that CO2, which can make your coffee taste off.
The Airscape containers are pretty popular, and I get why. They have this inner lid that pushes down to remove air, plus the one-way valve system. The Planetary Design ones are similar but a bit pricier.
Why Your Coffee Bag Isn’t Cutting It
Here’s something that shocked me: those fancy coffee bags with the valves aren’t meant for long-term storage once you open them. The valve only works one way, and once you break the seal, air gets in every time you open it. Plus, most bags aren’t resealable in any meaningful way.

I used to fold the bag over and clip it shut, thinking I was being smart. Nope. Air was getting in constantly, and my beans were going stale within a week of opening. Now I transfer beans to proper containers within 24 hours of opening the original bag.
Testing Your Container’s Seal (The Paper Test)
Want to know if your container is actually airtight? Try the paper test. Close a piece of paper in the lid and try to pull it out. If it slides out easily, your seal sucks. A good airtight container will grip that paper so tight you’ll have to open the lid to remove it.
For the go-getters and busy professionals, including those relying on quick portable brews, check out 11 Best Instant Coffee Brands for Busy Professionals—they care about freshness too!
I also do the shake test – fill the container with beans, seal it up, and shake it hard. If you hear the beans moving around freely, the container might be too big (too much air space) or not sealed properly. You want just enough air space for the beans to settle, but not so much that they’re bouncing around.
Features That Actually Matter When Shopping
Don’t get distracted by fancy designs and focus on these must-haves: First, make sure it’s completely opaque or stores in a dark place. Second, the seal should be rubber or silicone, not just plastic-on-plastic contact. Third, get something sized right for how much coffee you actually buy – huge containers for small amounts of beans just means more air space.
Look for containers with wide openings so you can actually get your hand in to clean them properly. Trust me, coffee oils build up over time and can make fresh beans taste rancid. Date tracking features are nice but not essential – just write the roast date on masking tape.
Optimal Storage Locations in Your Home
Finding the perfect spot for your coffee beans is trickier than you’d think. I’ve moved my coffee storage around my kitchen more times than I can count, and each location taught me something new about what works and what definitely doesn’t.
Kitchen Counter vs. Pantry vs. Cold Storage – The Ultimate Showdown
The kitchen counter seems like the obvious choice, right? Wrong. I kept my beans there for months before realizing how much the temperature fluctuates throughout the day. Every time I cooked dinner or ran the dishwasher, the ambient temperature would spike by 10-15 degrees. My beans were basically getting slow-cooked without me knowing it.

The pantry turned out to be my sweet spot. It stays consistently cool (around 65-70°F in my house), it’s dark, and the temperature doesn’t swing wildly like it does near appliances. The key is finding a shelf that’s not too high where heat rises, but not so low that it gets damp from floor moisture.
Now let’s talk about the fridge and freezer debate – this one’s controversial. Storing coffee in the refrigerator is generally a bad idea. The humidity levels are all wrong (usually 80-90%), and coffee beans are like little sponges that absorb moisture and odors. I tried it once and my coffee tasted like leftover pickles. Not good.
The freezer is different though. If you buy coffee in bulk and want to store portions for later, freezing can work. But here’s the trick: you gotta portion it out first, vacuum seal or use freezer bags, and never refreeze once you thaw it. I learned this when I kept taking my whole bag in and out of the freezer – the condensation was ruining everything.
Temperature and Humidity – The Numbers That Matter
Most people don’t realize how much temperature swings affect coffee freshness. Ideally, you want consistent temperatures between 60-70°F. Above 75°F and the oils start breaking down faster. Below 50°F and you risk condensation issues when you bring the container to room temperature.
Humidity is just as important. Sweet spot is around 50-60% relative humidity. Higher than that and you’re asking for mold problems. Lower and the beans can actually get too dry and brittle. I invested in a hygrometer after finding weird compounds build up on some expensive beans I’d stored on the shelf during a particularly humid summer.
Setting Up Your Coffee Command Center
Creating a dedicated coffee station changed my whole morning routine. I converted the corner of my pantry into coffee central – got a small shelf unit that fits my containers, grinder, and brewing gear all in one spot. The best part? It’s away from heat sources and stays consistently cool.
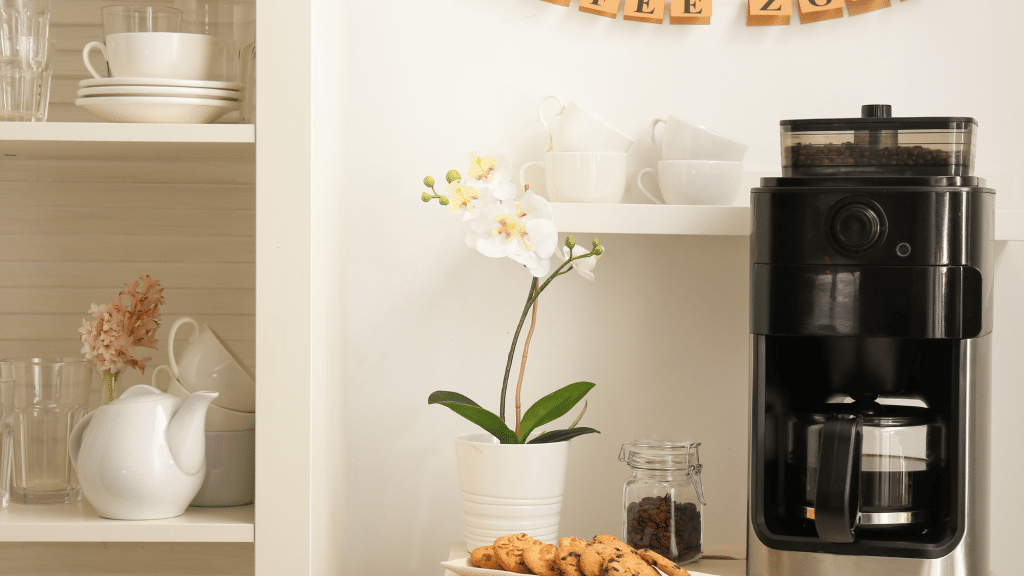
If you’re setting up your own station, think about workflow. You want your beans, grinder, and brewing equipment close together but not crowded.
Consider getting a small basket or tray to corral everything. Makes it easier to move stuff around when you need to clean, and it looks way more organized than having containers scattered around.
Seasonal Adjustments You Need to Know
Summer and winter require totally different strategies. During hot months, I move my coffee storage to the coolest part of the house, which happens to be a closet in my bedroom. Sounds weird, but it stays 5-10 degrees cooler than the kitchen.
Winter brings its own challenges, especially if you live somewhere with big temperature swings. The heating system cycles on and off, creating these mini temperature waves throughout the house.
Humidity changes seasonally too. Summer means higher humidity, so I’m extra careful about airtight seals. Winter air gets super dry from heating systems, so I actually have to be careful beans don’t get too brittle.
The Absolute Worst Places to Store Coffee
Learn from my mistakes: never store coffee near your stove or oven. I thought the cabinet above my stove was convenient until I realized the heat was slowly roasting my beans a second time. Same goes for anywhere near the dishwasher – those appliances put out way more heat than you’d expect.
Windows are another no-go zone, even if the container is opaque. The temperature swings from day to night are brutal, and if any light gets through, you’re double-screwed.
Avoid anywhere near heating vents, water heaters, or refrigerator coils. Basically, if it generates heat or vibration, keep your coffee away from it. The laundry room might seem convenient, but the dryer heat and humidity from washing machines create the worst possible environment for coffee storage.
The Freezer Debate: Settling the Controversy
This topic gets coffee people more fired up than pineapple on pizza. I’ve been to coffee shops where baristas would literally roll their eyes if you mentioned freezing beans. But here’s the thing – the science isn’t as black and white as everyone makes it seem.
Wondering if freezing instant is simpler? We cover that in Instant Coffee vs. Ground Coffee: Which is Right for You?, where we also weigh storage methods.
What the Research Actually Says About Frozen Coffee
The University of Bath did some fascinating research on this back in 2016, and their findings surprised a lot of people. They found that colder coffee beans actually grind more uniformly, which leads to better extraction. The study showed that beans ground at -19°C (typical freezer temp) produced more consistent particle sizes than room temperature beans.
But here’s where it gets interesting – they weren’t looking at long-term storage, just the grinding process itself. The frozen beans created less heat friction during grinding, which preserved more volatile compounds. So from a grinding perspective, freezing actually has some benefits.
A 2019 study from the Coffee Science Foundation looked at longer-term storage and found that properly frozen coffee beans retained their CO2 content and volatile compounds better than beans stored at room temperature for periods longer than 6 weeks. The key word there is “properly” frozen – we’ll get to that in a minute.
The Science Behind Why Freezing Can Work
Water activity is the real culprit in coffee degradation, not just moisture content. Coffee beans typically have a water activity level around 0.5, which is low enough that they won’t freeze solid in your home freezer. Instead, the cold temperature dramatically slows down the chemical reactions that cause staleness.
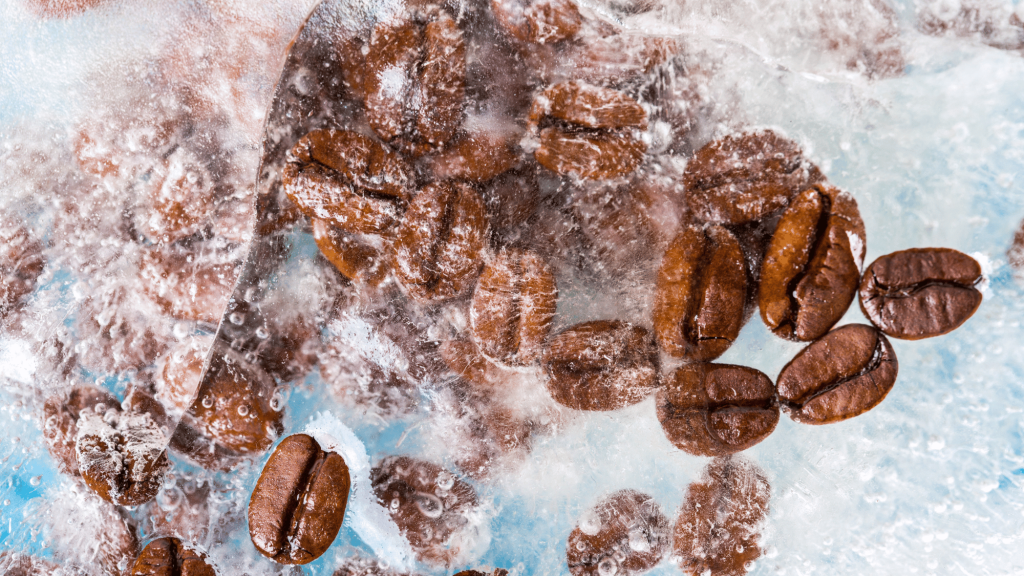
Oxidation happens about 50% slower at freezer temperatures compared to room temperature. The Maillard reaction compounds that give coffee its flavor also break down much slower when frozen. Think of it like putting your beans in slow motion – everything that makes them go stale just happens way more gradually.
The problem most people run into is condensation. When you take frozen beans out and they warm up, moisture from the air condenses on the cold surface. That moisture then gets absorbed into the bean structure, which can mess with extraction and potentially cause mold issues.
When Freezing Makes Sense (And When It Doesn’t)
The sweet spot for freezing is when you’ve got beans that are already past their peak degassing phase (7-10 days post-roast) but still within their prime window (under 3 weeks). Freezing them at this point basically hits the pause button on aging.
Don’t freeze beans if you’re planning to use them within 2-3 weeks. The freezing and thawing process can actually introduce more variables than just storing them properly at room temperature. Also, never freeze pre-ground coffee – the increased surface area makes it way too susceptible to moisture absorption.
Single-dose portioning is crucial if you’re going to freeze. I portion out exactly what I need for 3-4 days of brewing, vacuum seal each portion, and only thaw what I’m going to use immediately. Never refreeze thawed beans – that’s a recipe for disaster.
What Coffee Professionals Actually Think
I’ve watched dozens of roasters and baristas over the years, and opinions are all over the map. James Hoffmann, probably the most respected coffee educator out there, has come around to freezing for specific situations. His 2020 video on the topic basically says what I’ve experienced – it can work if done properly, but it’s not necessary for most people.
Scott Rao, who’s like the godfather of coffee science, has been pro-freezing for bulk storage for years. He recommends vacuum-sealing portions and freezing them within a week of roasting. His argument is that proper freezing preserves more flavor than room temperature storage over extended periods.
On the flip side, George Howell from George Howell Coffee argues that the complexity of proper freezing isn’t worth it for most home users. He thinks the risk of doing it wrong outweighs the benefits, and I honestly see his point. I’ve screwed up frozen coffee storage more times than I’ve gotten it right.
Counter Culture’s training materials actually include freezing protocols for their wholesale customers who need to store large quantities. They recommend vacuum-sealing 250g portions and freezing within 5 days of roasting. But they’re very clear that this is for commercial situations, not daily home use.
The consensus seems to be: freezing can preserve coffee effectively, but only if you do it exactly right. For most home users dealing with reasonable quantities of coffee, proper room temperature storage in quality containers is simpler and less risky. But if you’re buying expensive beans in bulk or want to preserve a special coffee for months, freezing done properly can definitely work.
Common Storage Mistakes to Avoid
I’ve made every coffee storage mistake in the book, and some I invented myself. Looking back at my early coffee days, it’s honestly embarrassing how much good coffee I ruined through pure ignorance. But hey, that’s how you learn, right?
Why Bulk Buying Backfires
Oh man, this was my biggest rookie mistake. I saw those massive 2-pound bags at the warehouse store and thought I was being smart – buying in bulk to save money. What actually happened was I saved maybe $5 but wasted probably $40 worth of coffee that went stale before I could drink it.

Here’s the math that nobody talks about: if you drink one cup a day using about 20 grams of coffee, a pound of beans lasts roughly 3 weeks. That 2-pound bag? You’re looking at 6+ weeks to get through it. By week 4, your coffee tastes like cardboard no matter how fancy your brewing setup is.
The sweet spot I’ve found is buying 12 oz bags – just enough for about 2.5 weeks of daily coffee. Yeah, it’s more expensive per pound, but you’re actually drinking good coffee instead of expensive disappointment. Plus, it lets you try different roasters and origins more frequently instead of being stuck with the same beans for months.
Speaking of convenience, our deep‑dive Instant Coffee Crystals vs Powder: What’s the Difference breaks down how beans become instant—and the storage impacts involved.
I know people who buy 5-pound bags and think they’re saving money. Unless you’re drinking 4+ cups a day or have a big household of coffee drinkers, you’re just creating an expensive composting project.
The “Peek-a-Boo” Problem – Opening Containers Too Often
This one’s subtle but deadly for coffee freshness. I used to open my coffee container every morning, take a deep whiff (because who doesn’t love that smell), measure out my beans, then maybe open it again later just to smell it or show it off to friends. Each time that lid comes off, you’re letting in oxygen and moisture while letting out CO2 and aromatic compounds.
I timed myself once and realized I was opening my coffee container 8-10 times a day. That’s 8-10 little hits of oxidation adding up over time. The solution was embarrassingly simple – portion out 2-3 days worth of beans into a smaller daily-use container, and only open the main storage container when I need to refill it.
Some people use those glass containers with the hinged lids that don’t seal properly, thinking it’s convenient to just flip them open quickly. Those are the worst offenders because the seal is never great to begin with, and frequent opening makes it even worse.
The best approach is what I call “bank vault” storage – your main stash stays sealed tight, and you have a smaller working container for daily use that holds just enough for a few days.
When Pretty Containers Kill Good Coffee
Instagram has a lot to answer for when it comes to coffee storage. Those beautiful clear glass canisters with the wooden lids? They look amazing in photos but they’re coffee killers. I bought a whole set of them because they matched my kitchen aesthetic perfectly.
The wooden lids rarely create an airtight seal, and even when they do, wood expands and contracts with humidity changes. Within a month, none of my containers sealed properly anymore. Plus, most of these decorative containers are sized wrong – either too big (leaving too much air space) or too small (forcing you to buy less coffee than you actually need).
The worst offender was this gorgeous copper container I got as a gift. Looked like something from a fancy coffee shop, but copper conducts heat like crazy. Every temperature change in the kitchen was transmitted directly to my beans. It was basically a coffee-destroying heat sink disguised as elegant storage.
Those mason jar trend containers are almost as bad. Sure, they’re airtight when new, but the metal lids start to corrode from coffee oils, and most people don’t replace the lids often enough. Plus, clear glass means light exposure unless you store them in a dark cabinet.
I learned to prioritize function over form. My current containers are boring black steel canisters that look like they belong in a restaurant kitchen, but my coffee tastes infinitely better. Sometimes ugly is beautiful when it comes to storage solutions.
Conclusion
Understanding how to store coffee beans properly is a game-changer for any coffee lover seeking that perfect cup! By keeping your beans away from their four enemies—air, moisture, heat, and light—and using the right containers in the right locations, you’ll experience flavors you didn’t know your coffee had. Remember that freshness begins with buying the right amount of beans and storing them immediately in appropriate containers. Why not implement these storage methods today? Your morning brew will thank you with enhanced flavors and aromas that make waking up something to look forward to!
Frequently Asked Questions
How long do coffee beans stay fresh after opening?
Once opened, whole beans stay fresh for about 2 to 4 weeks if stored right—think airtight container, cool spot, and away from sunlight.
Can I keep coffee beans in the fridge or freezer?
The fridge is a no-go (too much moisture). Freezer works only if you portion and vacuum seal beans you won’t use for a while.
What’s the best container to store coffee beans in?
Go for opaque, airtight containers—like stainless steel or dark ceramic. Skip clear jars unless stored in a dark cabinet.
Where should I store coffee beans in my house?
Pantry beats kitchen counter. Look for a cool, dark place away from heat and humidity—no windows, ovens, or dishwashers nearby!
Do coffee beans really go stale? How can I tell?
Yep! Stale beans smell flat and taste dull. Fresh ones have a strong aroma, crack when bitten, and bloom when brewed.