How to Make Iced Instant Coffee Like a Barista

Picture this: It’s a scorching summer day, and you’re craving a refreshing iced coffee. But wait – all you’ve got is instant coffee! Don’t despair!
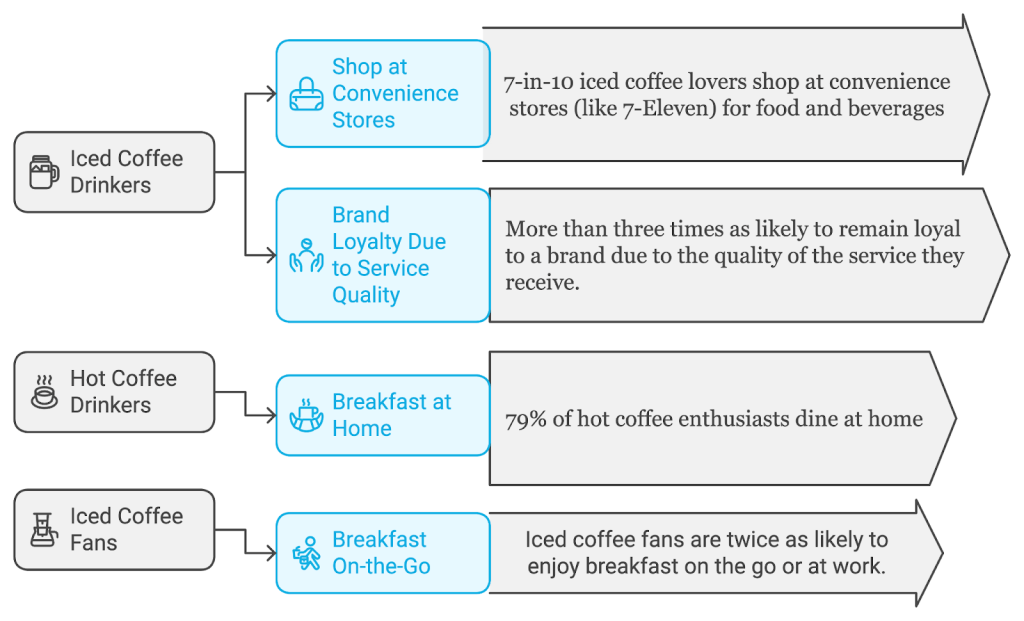
Data Survey conducted by CivicScience reveals the percentage of consumers who prefer iced coffee drinks has jumped nine points since 2021 to 27%. Gen Z is powering this shift. Let’s look at some ice coffee stats:
With a few barista tricks up your sleeve, you can turn that humble jar of instant into a coffee shop-worthy creation. Get ready to become your own at-home barista and impress your friends with Instagram-worthy iced instant coffee that’ll make them do a double-take.
Let’s dive into the cool world of elevated instant brews!
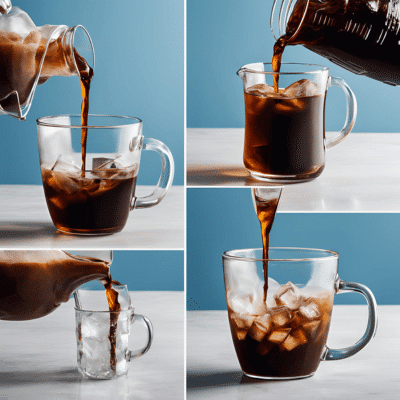
The Magic of Cold Water Brewing
Alright, so let me just say—I used to be one of those people who thought all about hot water when it came to instant coffee. You know, the standard, boiling water, stir, sip, go. But then one summer, when the heat was practically melting my brain.
I remember the day I first tried it. It was a scorching summer morning, and the thought of brewing hot coffee made me want to melt into a puddle right there in my kitchen. Out of desperation (and laziness, if I’m being honest), I decided to try mixing my instant coffee with cold water instead of hot.
I’ll admit, at first, I was skeptical about cold water. Like, how is it even gonna dissolve the coffee, right? That was the biggest myth I had to unlearn. Turns out, instant coffee loves cold water—maybe more than it loves hot. And if you’ve ever had iced coffee that was bitter or just kinda ‘meh,’ you’ll appreciate this: cold water brewing keeps the flavors smooth and mellow.
There’s no scorching or harshness, just a nice, balanced taste. The acidity drops off a bit too, making it way easier on your stomach. It’s almost like the cold water acts as a natural filter for any bitterness, letting all the good stuff shine through.
Why cold water is the secret to smooth iced instant coffee
So here’s what happens when you use cold water. Unlike hot water, which extracts every last bit of the coffee’s oils and sometimes bitterness (especially if you’re using low-quality stuff), cold water is much more patient. It extracts slower and more gently, which leaves you with a brew that’s naturally smoother and less acidic.
Discover low-acid options for cold coffee.
That’s why your iced coffee doesn’t just taste watered down—it actually holds onto the richer, chocolatey or nutty notes, depending on the coffee. It’s kinda like the coffee equivalent of slow cooking a stew instead of blasting it in the microwave. Same ingredients, totally different flavor.
Plus, no ice melt issues! If you brew hot, pour it over ice, and drink it fast, sure, you might be okay. But if you’re like me and you sip slow, that ice will start to melt and dilute your coffee. When you start with cold water, you’re already halfway to the perfect iced coffee—no melting, no watery finish.
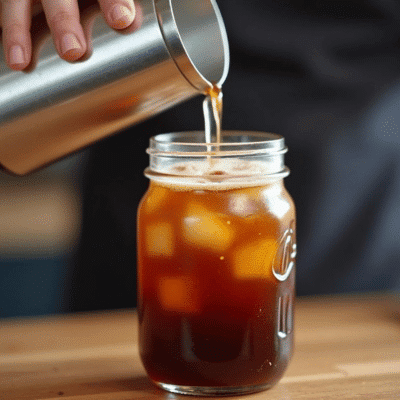
Step-by-step guide to the cold brew instant method
Let me walk you through the process, because it’s super easy. You can even make this the night before if you want it to be extra smooth by the morning.
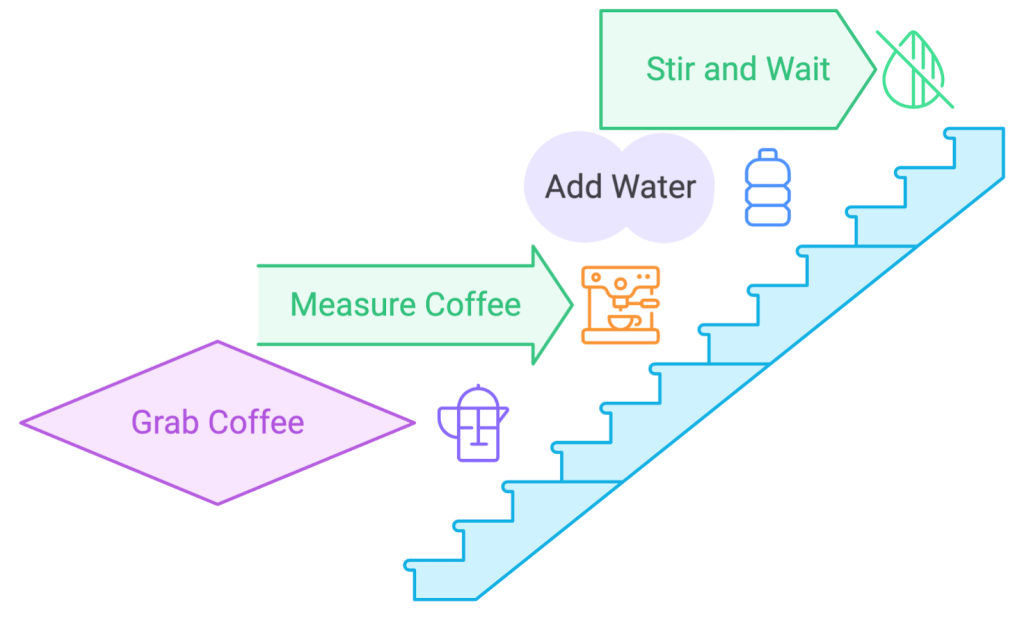
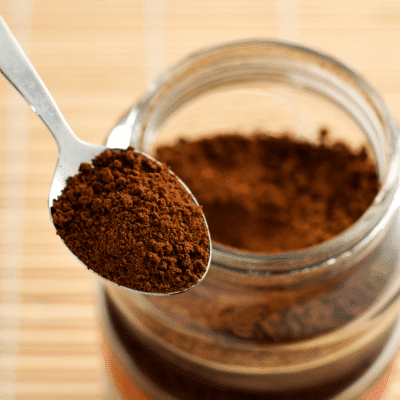
- Grab your instant coffee – Any brand works, but I recommend something that’s freeze-dried. They tend to dissolve more easily in cold water, in my experience. (Not gonna lie, I’ve tried some lower-quality granulated ones, and they were a struggle to dissolve.)
- Measure your coffee – This is where the magic really begins. The sweet spot I’ve found is about 1 to 1.5 teaspoons of instant coffee per 8 ounces of cold water. If you like it stronger, feel free to push it to 2 teaspoons. It’s all about your preference.
- Add cold water – Here’s the thing: you want to use either cold filtered water or, if you’re fancy like me sometimes, spring water. Why? It makes a difference! Tap water can mess with the flavor, giving it a chlorine-y aftertaste.
- Stir and wait – Now, this isn’t a ‘brew it in 30 seconds’ deal like hot coffee. It takes a couple of minutes for the coffee to fully dissolve in cold water, so give it some stirs and let it sit for about 2-3 minutes. Patience pays off here.
- Add ice (optional) – At this point, you can just throw in your ice and enjoy, but pro tip: try drinking it straight first. The flavor might surprise you. If it’s not strong enough for your taste, you can add more coffee at this stage, but remember that ice will dilute it a bit.
Ideal ratios for perfect flavor concentration
Alright, here’s where I made my mistake at first—thinking more coffee = better flavor. Nope. Too much instant coffee and it gets overpowering, almost chalky. But too little, and you’re drinking flavored water. The golden ratio I’ve settled on after a bunch of trial and error is 1.5 teaspoons of coffee per 8 ounces of water. This gives you a nice, medium-strength brew, perfect for adding ice and maybe a splash of milk or creamer.
But ratios are personal. If you’re into a stronger, more robust flavor, 2 teaspoons per 8 ounces will hit the spot. Just be aware that instant coffee can pack a punch, so start small and work your way up. If you’re a little more cautious like I am, 1 teaspoon is safe and smooth.
Here’s a pro tip I wish someone had told me earlier: if you’re planning to add milk or creamer, make your coffee a bit stronger than you think you need. The first time I added milk to my perfectly balanced cold brew, it turned into a sad, watery mess. Now I always brew it a touch stronger to compensate.
So, there you have it – my journey into the world of cold water brewing instant coffee. Give it a shot (pun totally intended) and see how it works for you. Who knows? You might just become an instant coffee convert like me. Just remember, patience is key, and don’t be afraid to experiment until you find your perfect brew. Happy caffeinating!
Shaken, Not Stirred: The Barista’s Mixing Technique
Let me tell you something—stirring instant coffee is fine, but if you want to really up your iced coffee game, it’s time to start shaking it like the pros. I used to be all about the quick stir, but once I learned the barista-style shake method, everything changed. I’m talking about a smoother, frothier drink that tastes way better than what you’d get with just a spoon. It’s one of those little hacks that makes a world of difference.
The importance of proper dissolution for better taste
Here’s the thing: instant coffee, especially when cold brewing, can be a little stubborn. If you don’t mix it well, you end up with those annoying little clumps of undissolved coffee floating around—or worse, stuck at the bottom of your glass. And nobody wants to get hit with a bitter, gritty surprise on that last sip.
When you shake instead of stir, you’re ensuring that all those coffee particles dissolve evenly, which means every sip is as smooth as the last.
It’s also about unlocking the full flavor potential. Proper dissolution helps the coffee fully integrate with the water, and for some reason (science!), shaking just does this better than stirring. The result? A richer, fuller flavor. You avoid that watery layer that sometimes happens when you just give it a half-hearted stir, and instead, you get a coffee that’s got depth from the first sip to the last. Seriously, it’s like night and day.
How to shake your iced instant coffee like a pro
So, how exactly do you do this? You don’t need to be a barista with years of experience to get it right, but there is a bit of a technique to it.
1. Start with your coffee and water
Just like in the cold brew method, you’ll want to add your instant coffee to cold water first. I usually go with about 1.5 teaspoons of instant coffee for 8 ounces of water.
You can adjust based on your taste, but this is a good starting point. And don’t forget the ice—fill the glass about halfway with ice cubes to keep it nice and chilled.
I gotta admit, there’s something oddly satisfying about hearing the ice cubes clinking around as you shake. It’s like a little wake-up call for your coffee – and for you!
2. Grab a shaker or any sealable container
Now, if you’re like me and don’t own a fancy cocktail shaker, don’t sweat it. You can use a mason jar, a water bottle with a lid, or even a Tupperware container.
Anything that seals tightly will work just fine. The goal here is to create some pressure so that when you shake, you’re not just mixing but also aerating the coffee.


3. Shake vigorously
This is the fun part. You’re not just giving it a little swirl; you want to shake it like you mean it. Go for about 20-30 seconds, and don’t be shy with it.
The more you shake, the frothier and smoother your coffee will be. You’ll know you’re doing it right when you see a little foam building up on top—that’s the sign of a well-mixed iced coffee.

4. Pour and enjoy
After you’ve shaken it up, pour it into your glass and give it a taste. You’ll notice that it’s well-mixed, there’s no undissolved coffee hanging around, and it’s got a slight frothiness that takes the texture to a whole new level.
Equipment alternatives for the perfect mix (no fancy tools required!)
Okay, let’s get real for a second. Not all of us have a sleek barista station at home with professional-grade equipment, and that’s fine. You absolutely don’t need anything fancy to get the perfect iced instant coffee mix. Here are a few budget-friendly alternatives that work just as well:
Mason jar: This is my personal favorite because it’s something most people already have in their kitchen. Plus, the wide mouth makes it easy to add your coffee, ice, and water without making a mess. Just screw on the lid tightly and shake away.
Water bottle: Got an old reusable water bottle lying around? Use that! Most water bottles seal up nice and tight, which makes them perfect for shaking your coffee. Just be sure to rinse it out well if you’ve been using it for anything with strong flavors (like, you know, your post-gym electrolyte drink).
Tupperware or any plastic container with a lid: This works in a pinch, especially if you’re low on other options. Just make sure the lid seals well. The last thing you want is to end up with coffee all over your kitchen because the lid popped off mid-shake. Trust me, I’ve been there—it’s not fun.

Cocktail shaker: If you’re feeling fancy and happen to have one around, go for it! Shakers are designed to mix things like a pro, so it’s a natural fit for this technique. But honestly, don’t go out of your way to buy one if you don’t already have it. The alternatives work just as well.

Shaking your iced instant coffee isn’t just about dissolving the coffee—it’s about creating a better drinking experience. The flavor, the texture, the frothiness—it all comes together when you give it a good shake. Plus, it’s kind of fun to play barista for a few seconds. So next time you’re making iced coffee, ditch the spoon, grab a jar (or whatever you have handy), and shake it like a pro. You’ll taste the difference, trust me!
Ice, Ice, Baby: Choosing the Right Cubes
I’ll be honest, for the longest time I thought ice was just ice—like, it’s frozen water, right? How much can it really affect your iced coffee? Turns out, quite a bit. The quality and type of ice you use can actually make or break your drink. I didn’t realize this until one day I used some questionable ice cubes from my old freezer and, well, let’s just say my coffee tasted like… freezer burn.
Not exactly what you’re craving with your morning pick-me-up. So, if you want your iced instant coffee to be the best it can be, choosing the right ice is essential.
Impact of ice quality on your iced instant coffee
First off, let’s talk ice quality. I didn’t think this mattered much at first either, but here’s the thing—bad ice can totally ruin the flavor of your coffee. If your ice has been sitting in the freezer too long, or if it’s picked up the smell of whatever mystery food is lurking in the back of your fridge, it’s going to impart those flavors into your coffee. No one wants their cold brew to taste like leftover lasagna, right? Trust me, fresh ice makes a world of difference.
Filtered water is key here, too. If you’re using ice made from tap water that’s full of chlorine or other chemicals, it can really mess with the smoothness of your iced coffee. When you’re working so hard to brew a perfect cup, why risk ruining it with low-quality ice? Filtered water (or bottled water if you’re fancy) will give you clean-tasting ice that complements your coffee instead of clashing with it.
Different types of ice and their effects on flavor
Not all ice is created equal, my friend. The size, shape, and even texture of the ice you use can totally change the experience of your iced instant coffee. Here’s a quick breakdown of different types of ice and how they impact your drink:
Standard Ice Cubes: You know these guys—just your typical square or rectangular cubes from your tray or ice maker. They melt at a moderate pace and are pretty standard for iced coffee. They’ll do the job just fine, but they tend to water things down quicker than you might like.

Crushed Ice: I used to think crushed ice was perfect for iced drinks—until I realized it melts way too fast. Crushed ice will cool your coffee down super quickly, but within a few minutes, you’ll notice your coffee getting watery. Great for a quick chill, but not if you plan on sipping slowly.
Ice Nuggets: This is the ice you find at places like Sonic or Chick-fil-A—the soft, chewable little nuggets. Honestly, they’re fun and give your coffee a nice texture, but they melt pretty fast. I love these in a cold drink when I’m in a rush because they cool things down fast, but again, they water it down quicker than solid cubes.

Clear Ice: Now, clear ice is the gold standard, especially for coffee purists. It’s made with super purified water and freezes slowly, so it doesn’t have any air bubbles or impurities trapped inside. This type of ice melts much slower, meaning your coffee stays chilled without getting watered down too fast. If you’re serious about your iced coffee game, investing in clear ice molds or trays might be worth it.
How to make coffee ice cubes for an extra flavor punch
Now, this trick right here—coffee ice cubes—is one I wish I’d known about years ago. Nothing ruins a good iced coffee faster than watered-down flavor. But when you use coffee ice cubes? Game changer. Instead of diluting your coffee as the ice melts, it actually strengthens the flavor. It’s one of those things that makes you feel like a genius when you discover it.
Here’s how to make them:
- Brew your instant coffee: First, whip up a batch of instant coffee using the same cold brew technique I mentioned earlier. You don’t need anything fancy here—just your usual ratio of coffee to water. I usually stick with a stronger brew for my ice cubes, like 2 teaspoons of coffee per 8 ounces of water, to pack that extra punch. If you’re feeling adventurous, you can even add a dash of sweetener or milk to the mix.
- Let it cool: Before you start pouring, make sure your coffee has cooled down to room temperature. You don’t want to put hot coffee into your ice cube tray—unless you’re aiming for a hot mess in your freezer. Trust me on this one, I learned the hard way.
- Pour into ice trays: Fill up your standard ice cube trays with the cooled coffee. You can also get creative and use silicone molds in fun shapes if you want to fancy up your iced coffee routine. Pop them in the freezer and let them chill for a few hours (or overnight if you’re prepping ahead).
- Use them in your iced coffee: Once they’re frozen solid, toss a few coffee ice cubes into your iced instant coffee, and enjoy as the flavor gets more intense rather than watered down. Bonus tip: you can also blend these coffee cubes for a killer iced coffee slushie!
Honestly, the whole coffee ice cube thing is a win-win. It’s one of those little tricks that takes your iced coffee from “meh” to “wow” with practically zero effort. Plus, you can keep a stash in the freezer for those days when you need your caffeine fix fast but don’t want to compromise on flavor.
So yeah, ice is way more important than I used to give it credit for. The right ice can elevate your iced instant coffee, while the wrong kind will leave you sipping something weak and watery. And if you want to really level up? Try making those coffee ice cubes—you’ll thank me later!
Sweetening the Deal: Flavor Enhancers and Syrups

Okay, so let’s get real: iced coffee is great on its own, but sometimes you want to sweeten the deal a little bit. Whether you’re craving something indulgent or just looking to balance out the bitterness of your brew, the right sweeteners and syrups can take your iced instant coffee from basic to café-worthy. And don’t worry—you don’t need a fancy barista setup to pull this off at home.
With a few simple ingredients and some creativity, you can whip up flavor enhancers that’ll make your morning cup feel like a treat.
Best sweeteners for cold coffee drinks
First things first: not all sweeteners are created equal, especially when it comes to cold drinks. Some dissolve better than others, and the texture can make or break your iced coffee experience. I’ll admit, I made the rookie mistake of trying to stir in regular granulated sugar when I first started making iced coffee. Spoiler: it didn’t dissolve. I’d be sipping away, and then BAM—grainy sugar bits at the bottom of my cup. Not cute.
Here are some of the best sweeteners for cold coffee drinks that dissolve easily and add the perfect touch of sweetness:
- Simple Syrup: This is the gold standard for sweetening iced coffee. It’s just sugar that’s been dissolved in water, so it mixes seamlessly into cold beverages. You can buy it, but making your own (more on that in a sec) is super easy. Plus, you can infuse it with different flavors!
- Honey: Now, I know honey can be a bit divisive in the coffee world, but if you’ve never tried it in iced coffee, you’re missing out. It has a natural sweetness that’s a little more mellow than sugar, and if you warm it up a bit before adding it to your drink, it dissolves surprisingly well. Plus, it adds a nice floral note to your coffee.
- Agave Nectar: Agave is great if you want something a little more natural than sugar but still want that sweetness. It dissolves easily and has a slightly caramel-like flavor that complements the coffee beautifully.
- Maple Syrup: This is one of my personal favorites, especially if you’re going for a cozy, fall-inspired iced coffee. Just a drizzle of real maple syrup (skip the fake stuff) gives your coffee a rich, earthy sweetness with hints of caramel and vanilla. It’s perfect for those mornings when you need a little extra comfort in your cup.
- Stevia or Monk Fruit: If you’re watching your sugar intake, stevia and monk fruit are great options. They’re natural sweeteners with zero calories and dissolve fairly easily in cold drinks. Just be mindful of the amount—they’re much sweeter than regular sugar, so a little goes a long way.
Bonus tip: Want to jazz things up? Throw in a vanilla bean or a cinnamon stick while it’s simmering to infuse the syrup with extra flavor. You could also add a few sprigs of fresh mint for a refreshing twist, or even some citrus peels if you’re feeling fancy.
Creative flavor combinations to try in your iced instant coffee

Now, this is where things get fun. Once you’ve got your simple syrup (or other sweeteners) down, it’s time to start experimenting with different flavor combos to really elevate your iced instant coffee. Here are a few ideas that’ll make your coffee taste like it came straight from your favorite café:
- Vanilla Almond Delight: Add a splash of vanilla syrup and almond milk for a creamy, nutty coffee that feels indulgent without being overly sweet. This one’s a crowd-pleaser and perfect for those mornings when you want something smooth and comforting.
- Honey Lavender: This combo might sound a bit out there, but trust me, it’s amazing. Add a touch of honey and a dash of lavender syrup (you can make lavender simple syrup at home by infusing the basic recipe with dried lavender). The result is a floral, lightly sweetened iced coffee that’s calming and refreshing.
- Maple Cinnamon Dream: For cozy fall vibes, try mixing in some maple syrup and a sprinkle of cinnamon. You’ll get that warm, comforting flavor with a little extra spice. This one pairs beautifully with oat milk if you’re a fan of dairy alternatives.
- Coconut Caramel: Want something tropical? Add a splash of coconut milk and a drizzle of caramel syrup to your iced instant coffee. It’s sweet, creamy, and has just the right hint of coconut to transport you straight to a beachy paradise.
- Mocha Mint Magic: For a cool, refreshing treat, add chocolate syrup and a few drops of peppermint extract. It’s like a mint chocolate chip ice cream, but in coffee form. Perfect for those hot summer afternoons when you need something sweet and cooling.
Sweetening your iced instant coffee doesn’t have to be boring or complicated. With a few simple ingredients and some creative flavor combos, you can turn your basic coffee into a delicious, café-worthy treat.
Whether you’re going for classic vanilla or trying something adventurous like honey lavender, the key is experimenting until you find your perfect blend. And hey, once you’ve got your favorite combo down, it might just become your signature drink!
The Creamy Question: Milk and Alternatives
Ah, milk in coffee. It’s one of those things that can either make your iced instant coffee feel like a smooth, creamy treat—or turn it into a curdled mess if you’re not careful. I’ve definitely had my fair share of coffee fails when it comes to milk choices, especially with iced drinks.
But once I figured out what works best, it totally changed my coffee game. If you’re a fan of that silky smooth, creamy texture in your iced coffee, picking the right milk (or plant-based alternative) is key. Whether you’re sticking with the classics or going dairy-free, let’s dive into the options.
Selecting the right milk for your iced instant coffee
Starting with the basics, if you’re into regular ol’ dairy milk, you’ve got a few options depending on how creamy or light you want your iced coffee to be.
Personally, I love how whole milk adds that rich, full-bodied texture to iced coffee—it’s thick enough to give your drink that café-style creaminess without overpowering the flavor of the coffee itself. But if you prefer something lighter, 2% or even skim milk works just fine, though they won’t give you quite the same smooth mouthfeel.
Here’s a quick breakdown of how different types of dairy milk can change your iced coffee:
- Whole Milk: The go-to for creaminess. If you want that indulgent, full flavor in your iced coffee, whole milk is the way to go. It adds a lush texture and richness that pairs perfectly with the bitter notes of coffee.
- 2% or Skim Milk: These are lighter alternatives if you want to cut back on fat but still want some creaminess. 2% strikes a nice balance between creamy and light, while skim milk is more watery but still smooths out the coffee a bit.
- Half-and-Half or Heavy Cream: Now, if you really want to go all out, try using half-and-half or even heavy cream. It’s decadent, no doubt, but also super rich. I only go for this when I’m craving something extra special, since it can feel a bit heavy for everyday iced coffee.
Plant-based options for dairy-free delights
Dairy isn’t for everyone—whether it’s for health reasons, dietary preferences, or simply because plant-based milks can offer some seriously awesome flavors. There was a time when I thought non-dairy alternatives couldn’t possibly match up to the creaminess of real milk, but I was so wrong.
Plant-based options have come a long way, and some of them have become my go-to even when I’m not trying to avoid dairy. Here are a few of the best ones I’ve tried in iced coffee:
- Almond Milk: One of the most popular plant-based milks, almond milk is light and nutty. It’s great if you want something that won’t overpower the flavor of your coffee, but it’s not super creamy on its own. If you’re an almond milk fan, go for the unsweetened version if you want to control the sweetness.
- Oat Milk: This is a game changer if you’re looking for something that’s thick and creamy without dairy. Oat milk has this wonderful texture that’s somewhere between 2% and whole milk. It also has a slightly sweet, almost malty flavor that pairs beautifully with coffee. Honestly, I think it might be the best plant-based option for iced coffee. Plus, it froths really well, which I’ll get into in a minute!
- Soy Milk: Soy milk used to be the default non-dairy option, and for good reason—it’s creamy and has a neutral taste. It’s also packed with protein, which helps it hold up well in coffee. Just be careful with curdling (more on that in a sec). I’ve found that using soy milk specifically made for baristas helps avoid that.
- Coconut Milk: If you’re into tropical vibes, coconut milk is a fun choice. It’s super rich and adds a coconutty sweetness to your iced coffee. Just know that the coconut flavor can sometimes overpower the coffee, so if you’re using it, go easy on any additional sweeteners.
- Cashew Milk: This one is similar to almond milk but creamier. Cashew milk blends into coffee really well and doesn’t have as much of a nutty taste, which is great if you want something mild but still creamy.
Pro Tip for Plant-Based Milks: If you’ve ever noticed that your plant-based milk curdles in your iced coffee, you’re not alone—it’s super frustrating. The trick is to either use a milk specifically designed for baristas (yes, they exist!) or to avoid pouring cold milk into hot coffee.
If your coffee is warm, wait for it to cool a bit before adding your milk, or pour the milk in first and then add the coffee. That way, you avoid that unpleasant separation.
Frothing techniques for a latte-like experience

If you’ve ever been to a café and wondered how they get their iced coffee so creamy and frothy, the secret is in the frothing technique. And guess what? You don’t need a fancy espresso machine to achieve that latte-like texture at home.
Here are a few easy ways to froth your milk (or plant-based alternatives) without any expensive equipment:
- Mason Jar Method: This is probably the easiest method if you don’t have any tools. Just pour your milk into a mason jar, screw the lid on tight, and shake it like crazy for 30 seconds to a minute. The milk will foam up and create a nice frothy texture. You can even heat it for a few seconds in the microwave afterward if you’re using it in a hot drink, but for iced coffee, cold froth works great too!
- Handheld Frother: This little gadget is a game-changer and super affordable. You can pick up a handheld frother for under $20, and it works wonders. Just turn it on and whisk the milk until it’s nice and frothy. This is my go-to when I want a creamy iced coffee that feels a little more elevated.
- French Press: If you have a French press, you can use it to froth milk too! Just pour in your milk and pump the plunger up and down until the milk doubles in size and gets frothy. It’s a little more work than a handheld frother but still super effective.
- Blender: If you’re making a big batch of iced coffee, you can use your blender to froth the milk. Just blend it on high for about 30 seconds, and you’ll have creamy, frothy milk ready to pour over your coffee.
Whether you’re going for that rich, creamy texture with whole milk or trying out plant-based alternatives, the right milk (or milk frothing technique) can elevate your iced instant coffee experience to a whole new level.
It’s all about finding the perfect balance of creaminess and flavor that works for you. And once you master frothing at home, you’ll wonder why you ever paid $5 for an iced latte!
Presentation Matters: Serving Like a Pro
Let’s be honest—iced coffee tastes even better when it looks like something straight off a café menu. Presentation isn’t just about showing off (though, hey, why not?), but about creating a full experience.
The right glass, layering techniques, and a perfect garnish can transform your simple iced instant coffee into a drink that feels luxurious. You don’t have to be a professional barista to pull this off, either. Trust me, with a few easy tricks, you’ll be serving iced coffee that looks as good as it tastes.
Glassware choices that elevate your iced coffee game
First up, let’s talk glassware. I’m not saying your iced coffee needs to be in a crystal goblet (though that would be fun), but choosing the right glass makes a huge difference in how your drink feels. I used to pour my iced coffee into whatever cup was lying around—and then wonder why it didn’t quite feel “right.” The reality is, the container you choose affects not only the look but also how the drink feels in your hand.
For a pro touch, here are some glassware options that take your iced coffee up a notch:
- Tall Glasses: Classic and clean. Tall, highball-style glasses are perfect for showing off those layers in your iced coffee, especially if you’re doing a nice milk swirl. Clear glass allows you to see all the beautiful coffee-to-cream transitions, which is visually satisfying. Plus, they hold a good amount of coffee, ice, and milk, so you get the perfect coffee-to-milk ratio every time.
- Mason Jars: Want something more rustic and Instagrammable? Mason jars are where it’s at. They’ve got that cozy, homemade feel while still being trendy. They’re also super sturdy, so if you’re accident-prone like me, they’re a great choice. Plus, the wide opening is perfect for adding lots of ice and fun garnishes.
- Double-Walled Glasses: If you’re really looking to impress (or just keep your drink cold longer), double-walled glasses are where it’s at. These sleek glasses not only look modern, but they also keep your iced coffee colder for longer without all the condensation on the outside. It’s like magic—cold coffee, warm hands.
- Vintage Coupes: Feeling fancy? Serve your iced coffee in a vintage coupe glass. This is more of an unexpected choice, but it adds an elegant, cocktail-like vibe to your drink. I started doing this when I wanted to feel like I was treating myself to something special, and honestly, it makes iced coffee feel like a celebration.
Layering techniques for visually stunning drinks
Layering your iced coffee not only looks amazing, but it’s also a subtle nod to the art of coffee-making. Even if you’re just making iced instant coffee, you can create a café-quality layered drink with the right technique.
- Start with Ice: The key to perfect layering is starting with your ice. Fill your glass about halfway (or more if you want it extra cold). The ice helps slow the mixing process, so when you add different liquids, they don’t immediately blend together. You get those Insta-worthy layers.
- Coffee First: Pour your brewed instant coffee over the ice first. If you want the coffee to stay on the bottom, make sure it’s cooled down before pouring it over. Hot coffee will melt the ice too fast and blend everything together. Trust me, I’ve made that mistake more times than I care to admit.
- Milk or Cream Next: Slowly pour your milk or cream over the back of a spoon to gently layer it on top of the coffee. If you’re using a plant-based milk, like almond or oat milk, this method works beautifully to keep the layers distinct. As you pour, you’ll start to see the milk swirl down into the coffee, creating those gorgeous, separated layers.
- Syrups and Sweeteners Last: If you’re adding any syrup or sweetener, like vanilla or caramel, drizzle it in at the end. The syrup will slowly sink to the bottom, adding another layer of flavor (and color!) to your drink. You can also gently stir everything right before drinking, so you get that perfect mix of sweetness and creaminess with every sip.
Garnish ideas to add that final touch of elegance

This is where you can really have fun and give your iced coffee that final, elegant flourish. Garnishes aren’t just for cocktails—your iced coffee deserves some love, too! I’ve found that even the simplest garnishes can make a huge difference in how your drink is perceived, whether you’re making it for yourself or impressing a guest.
- Cinnamon or Cocoa Powder: A light dusting of cinnamon or cocoa powder on top of your iced coffee is a super simple way to elevate the look and flavor. It gives your drink a warm, cozy vibe, especially if you’re going for a mocha or spiced coffee flavor.
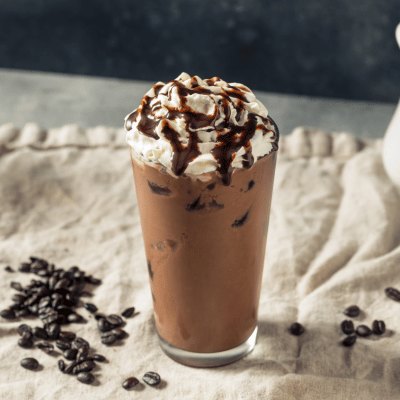
- Whipped Cream: Okay, who doesn’t love whipped cream? A swirl of whipped cream on top of iced coffee adds a fun, indulgent touch. You can even go the extra mile and drizzle some caramel or chocolate sauce over the top for a decadent finish.
- Coffee Beans: This might sound a little extra, but placing a couple of whole coffee beans on top of your drink (especially if it’s topped with whipped cream) makes it look super professional. It’s like the perfect little nod to the drink’s main ingredient, and it adds a hint of texture.
- Mint Leaves: For a fresh twist, garnish your iced coffee with a sprig of mint. It’s especially nice with iced coffee that’s been sweetened with honey or flavored with vanilla. The bright green adds a pop of color and a refreshing flavor contrast.
- Citrus Zest: If you’re feeling adventurous, try grating a bit of orange or lemon zest over your iced coffee. It sounds unusual, but citrus pairs surprisingly well with the bitter notes of coffee. It adds a fresh, tangy kick that brightens up the drink, making it perfect for summer mornings.
- Chocolate Shavings: For something a little more indulgent, sprinkle some dark chocolate shavings on top of your iced coffee. It adds a rich, luxurious touch and pairs perfectly with caramel or mocha-flavored drinks.
With a little attention to detail, your iced instant coffee can look just as good as any drink you’d get from a café—if not better. The right glass, the perfect layering technique, and a thoughtful garnish make all the difference in creating an experience that’s both delicious and visually stunning.
Whether you’re serving yourself or showing off for friends, a few simple tweaks can turn your everyday iced coffee into something truly special. Cheers!
Final Thoughts
There you have it, coffee lovers! With these 10 barista-approved tricks, your iced instant coffee game is about to reach new heights. Remember, great coffee is all about experimentation and finding what tickles your taste buds.
So go ahead, play around with these techniques, and don’t be afraid to get creative. Who knows? You might just create the next viral coffee trend from the comfort of your kitchen. Stay cool, caffeinated, and ready to impress – your perfect iced instant coffee awaits!
Frequently Asked Questions
Can I use instant espresso powder instead of regular instant coffee for a stronger iced coffee?
Yes, you can use instant espresso powder for a more intense flavor. Start with about half the amount you’d use of regular instant coffee, as it’s typically stronger.
Adjust to taste, and remember it may require more milk or sweetener to balance the robust flavor.
How long can I store homemade iced instant coffee in the fridge?
Properly stored in an airtight container, black iced instant coffee can last 3-4 days in the fridge.
If you’ve added milk, consume within 24 hours for best taste and food safety. Always smell and check for any signs of spoilage before drinking.
Is it possible to make a low-calorie version of iced instant coffee that still tastes good?
Absolutely! Use unsweetened almond milk or skim milk for creaminess without excess calories.
Sweeten with a zero-calorie sweetener like stevia or monk fruit. For flavor, try adding a dash of cinnamon or a few drops of vanilla extract instead of sugary syrups.
Can I use instant coffee to make other cold coffee drinks like frappés or affogatos?
Yes, instant coffee is versatile for cold drinks. For a frappé, blend instant coffee, milk, ice, and sweetener.
For an affogato, pour a shot of cooled, concentrated instant coffee over a scoop of vanilla ice cream. Get creative with flavors and toppings!
How does the caffeine content in iced instant coffee compare to regular brewed iced coffee?
Typically, instant coffee has slightly less caffeine than brewed coffee. An 8 oz cup of instant coffee contains about 60-80 mg of caffeine, while brewed coffee has 80-100 mg. However, this can vary based on the brand and how strong you make your coffee.